SAP Enterprise Portal – Configuration to make Custom Page as Default Logon Page
SAP Portal Log on page customization is an essential requirement to align SAP Portal’s appearance to enterprise branding. It becomes urgent when SAP Portal is exposed to outer world for business transactions. Customized Portal page provide uniform end user experience while providing secured contents using authentications.
To achieve Portal Log on Page customization, it involves SAP Portal Developer and Basis support for development and configuration activities respectively. This post elaborates more on configuration part (after development and deployment) which involves Config tool and thus require involvement of Basis support. This post will enable Portal developer to do these configurations by their own if they have rights to access these tools.
Platform
Configurations mentioned in this post are applicable for SAP NW 7.0 (2004s) as .par files are used to customize portal branding. SAP NW CE (Composition Environment) uses .war files which makes .par files obsolete. But still there is a provision to import .par files to CE based platforms and reusing old investments.
Prerequisites
It is assumed that you have already customized standard .par file under your custom name. e.g. com.<company-name>.logon.par. This custom project must be deployed to portal system.
J2EE server should be stopped to make configuration changes.
Configuration
After deploying .par file to your Portal system, you need to change default authentication scheme for portal. This is required because portal is still pointing to default authentication scheme. This approach will preserve original configurations and allow you to modify these configurations as per requirement. You can revert back to default settings at any point of time, which follows best practice and is very effective without fearing any loss.
Following are the steps to perform post development customization -
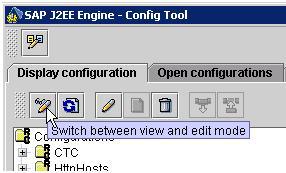
Go to Config tool using following path \usr\sap\<SID>\JC00\j2ee\configtool. Click on change mode button.
Go to Display Configuration Tab -> Cluster Data -> server -> persistent -> com.sap.security.core.ume.service
Go to change mode as shown below
Open ‘com.sap.security.core.ume.service’ node and double click on
authscheme.xml file. A popup will display this file. Click download
button and save to your local file system for changes.
Edit this file and replace ‘com.sap.portal.runtime.logon’ from file
with ‘com.<custom-name>.logon’ keeping other settings intact.
Save this file for use in following steps.
Now select ‘com.sap.security.core.ume.service’ node and click on create new icon as shown below
Enter the name as shown in fig. E.g. authschemes_<custom-name>.xml. Click upload button.
Select your customized authscheme.<custom-name>.xml file for
upload. Click Create button to finish it. Newly created file will
enlisted as shown below.
On double click file will look as follows.
Go back to change to read only mode
Then click on button to switch to config mode as shown below
- It will come back to original window. Navigate to cluster-data -> Global Server configuration -> services -> com.sap.security.core.ume.service
- On Select “com.sap.security.core.ume.service” right side window will appear.
- Select “logon.authschemes.definition.file”
- Enter Value as “authschemes_<custom-name>.xml” in field last of screen on right side pane.
- Click on Set button and new value will appear in Custom Value column as shown below.
Save the settings and start the server to view custom portal page.
Source:
http://elnetweaver.wordpress.com/2011/09/05/sap-enterprise-portal-logon-page-customization-configurations/


